Using the Martha Stewart instructions I found through this pin, I created my own fabric-covered circular tray to accent my home.
Here's mine:

1. Have a cookie sheet (easier to do than a circular tray) or circular tray. Try to clean off the service as best you can. Cut a piece of fabric large enough to cover the surface of the tray and wrap around it. I used a square shape of fabric for mine.

2. Using an adhesive spray and following those directions, spray the inside of the tray.
(don't spray the side quite yet!)

3. Starting from the center, use a circular motion to flatten out the fabric across the center of the tray to the outer edges.


4. Spray the rim of the tray and carefully smooth out the fabric over the edges. After this, I let the tray sit over night to completely dry and to think about how to tackle the next challenge. After having done it once, I would say the project overal would need a half hour to do and then whatever amount of time the adhesive needs to dry.

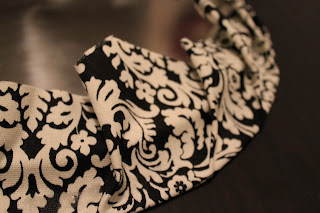
5. This is the where probably the hardest part for me began. The instructions I followed were for a cookie sheet, not for a circular tray, so I had to figure out how to best wrap my fabric around. If you have greater expertise in this PLEASE give some advice.
I cut off extra fabric and the corners to prepare for pleating the fabric around the tray. Having the odd shape helped me grab the fabric and adjust it to my liking.

6. Spray the outside of the rim and pleat the fabric so your fabric is smooth on the outermost edge and retains the circular frame of the tray.
7. Finally, spray bottom of the tray and fold down the left over fabric. After this dried my tray was done! Someday I may eventually purchase some felt or cork to cover the bottom of the tray. For now, though, this was good enough for me.

Here's the pin with a video demonstration on the original site.
Here's mine:

1. Have a cookie sheet (easier to do than a circular tray) or circular tray. Try to clean off the service as best you can. Cut a piece of fabric large enough to cover the surface of the tray and wrap around it. I used a square shape of fabric for mine.

2. Using an adhesive spray and following those directions, spray the inside of the tray.
(don't spray the side quite yet!)

3. Starting from the center, use a circular motion to flatten out the fabric across the center of the tray to the outer edges.


4. Spray the rim of the tray and carefully smooth out the fabric over the edges. After this, I let the tray sit over night to completely dry and to think about how to tackle the next challenge. After having done it once, I would say the project overal would need a half hour to do and then whatever amount of time the adhesive needs to dry.

5. This is the where probably the hardest part for me began. The instructions I followed were for a cookie sheet, not for a circular tray, so I had to figure out how to best wrap my fabric around. If you have greater expertise in this PLEASE give some advice.
I cut off extra fabric and the corners to prepare for pleating the fabric around the tray. Having the odd shape helped me grab the fabric and adjust it to my liking.

6. Spray the outside of the rim and pleat the fabric so your fabric is smooth on the outermost edge and retains the circular frame of the tray.

7. Finally, spray bottom of the tray and fold down the left over fabric. After this dried my tray was done! Someday I may eventually purchase some felt or cork to cover the bottom of the tray. For now, though, this was good enough for me.

Here's the pin with a video demonstration on the original site.

No comments:
Post a Comment